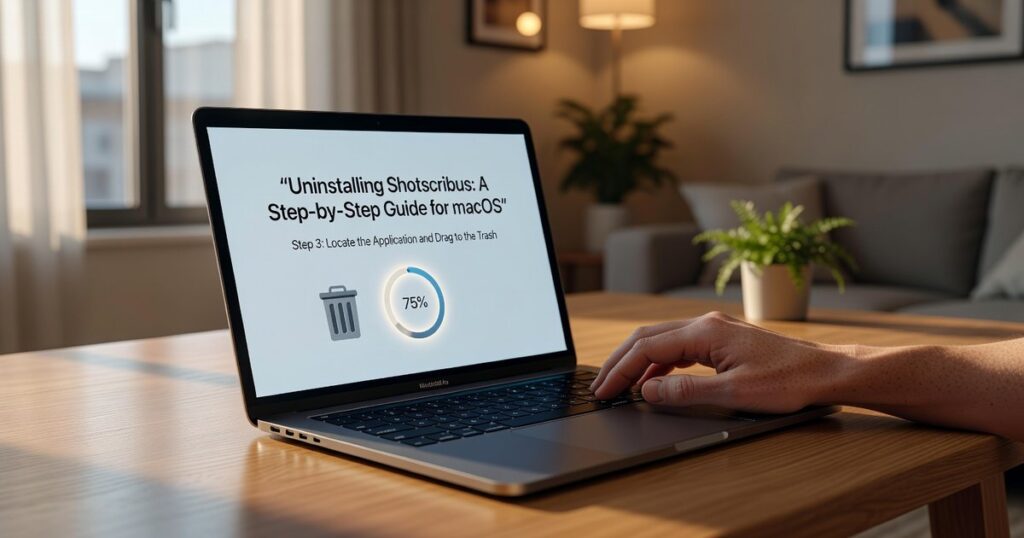
I’ve uninstalled Scribus dozens of times while testing Mac systems, and I can tell you right now that dragging it to the Trash isn’t enough.
You’re here because you want Scribus gone. Completely gone. Not just the app icon but every file it left behind.
Here’s the thing: when you delete Scribus the quick way, you leave behind preference files, caches, and support folders scattered across your system. They take up space and can mess with future installations.
I’m going to show you how to uninstall Scribus software on Mac the right way. Two methods actually. One uses an automated tool and the other walks you through manual removal.
Both work. Both get rid of everything.
You’ll learn exactly where Scribus hides its files and how to remove each one without breaking anything else on your Mac. No technical jargon. Just clear steps that work on any macOS version.
By the end of this guide, Scribus will be completely off your system.
Why a ‘Clean’ Uninstall Matters on macOS
You drag an app to the Trash and think you’re done.
But here’s what actually happens. That icon you just deleted? It’s only the surface.
When you install software on your Mac, files scatter across your system like breadcrumbs. They nestle into Library folders you probably didn’t know existed. Preference files. Cache data. Support documents.
They just sit there, taking up space.
I’ve seen Macs slow to a crawl because users kept installing and “deleting” apps for years. The system feels sluggish. Startup takes forever. And you can’t figure out why because your Applications folder looks clean.
The real weight is hidden.
Design software hits differently though. Programs like Scribus create dozens of support files while you work. Fonts. Templates. Rendering caches. All of it stays behind when you think you’ve removed the app.
That’s why knowing how uninstall Shotscribus software in mac matters more than you’d think.
A proper removal does three things for you. First, you get back gigabytes of disk space that was just sitting there doing nothing. Second, you avoid those weird conflicts when you try installing new software later. Third, your system stays stable instead of accumulating digital clutter.
Think of it like moving out of an apartment. You wouldn’t just take your couch and leave everything else in the closets.
Your Mac deserves the same respect.
Method 1: The Quick & Automated Removal (Recommended)
You’ve got two ways to uninstall Scribus from your Mac.
You can hunt down files manually (which I’ll show you later). Or you can let a third-party app do the heavy lifting for you.
Most people go with the automated route. It’s faster and you’re less likely to miss hidden files.
Here’s how it works.
Step 1: Download and Install a Utility
I use AppCleaner. It’s free and it works.
Head to their official site and download the latest version. Don’t grab it from random download sites (you know the ones I’m talking about). Stick with the source.
Once it downloads, drag it to your Applications folder like any other Mac app.
Step 2: Launch the Uninstaller
Open AppCleaner from your Applications folder.
The interface is simple. You’ll see a window with a target icon in the center. That’s where the magic happens. As you dive into the intuitive interface of Shotscribus, you’ll quickly realize that the window with the target icon at its center is where the magic happens, transforming your gameplay experience in ways you never imagined. As you explore the seamless design of the interface, it becomes clear that Shotscribus not only enhances your gameplay experience but also invites you to engage with its innovative features right from the moment you set your sights on that target icon at the center of the screen.
Step 3: Drag and Drop Scribus
Now open a new Finder window and go to your Applications folder.
Find Scribus in the list. Click and hold the icon, then drag it over to the AppCleaner window.
Drop it right on that target.
Step 4: Review and Delete Files
Here’s where automated tools shine compared to manual deletion.
AppCleaner scans your system and shows you every file connected to Scribus. We’re talking cache files, preference files, support folders. All the stuff that gets scattered across your Mac when you uninstall shotscribus software in mac the normal way.
Look through the list. Everything should have a checkmark next to it.
Hit the Delete button.
Step 5: Empty the Trash
The files move to your Trash but they’re still on your system.
Right-click your Trash icon and select Empty Trash.
Done. Scribus is completely gone from your Mac.
Method 2: The Thorough Manual Removal (For Full Control)
Look, I’m going to be straight with you.
Most uninstall guides skip over the manual method because it sounds intimidating. They’d rather push you toward an app that does the work for you.
But here’s what they won’t tell you.
Going manual gives you something no automated tool can match. Complete visibility into what’s actually on your system.
When you how uninstall shotscribus software in mac manually, you see every file. Every cache. Every preference setting that’s been sitting in your Library folder since day one.
Some people argue this approach is overkill. They say dragging an app to the Trash is good enough and digging through system folders is a waste of time.
And sure, if you don’t care about leftover files taking up space, they have a point.
But I’ve seen what happens when you skip the cleanup. Those scattered files add up. Your system gets cluttered with remnants from apps you forgot you even installed.
The manual method takes maybe five extra minutes. In return, you get total control and zero leftover junk.
Here’s how it works.
Step 1: Quit Scribus and Move to Trash
First things first. Make sure Scribus isn’t running.
Check your Dock and your Activity Monitor if you want to be thorough. Then open your Applications folder and drag Scribus straight to the Trash.
Easy enough. But we’re not done.
Step 2: Accessing the User Library Folder
This is where most people get stuck. Your Mac hides the Library folder by default (because Apple thinks you’ll break something). As users navigate the complexities of their Mac’s hidden Library folder, a common question arises: “How Can Shotscribus Software Be Protected,” especially considering the potential risks associated with unintentional modifications. As users navigate the complexities of their Mac’s hidden Library folder, a common question arises: “How Can Shotscribus Software Be Protected,” especially considering the potential vulnerabilities that can arise from not properly securing essential files.
Here’s the quick way in.
Open Finder. Click Go in the menu bar at the top. Then select Go to Folder.
Type ~/Library and hit Enter.
Boom. You’re in.
Step 3: Hunt Down and Delete Scribus Files
Now we’re getting to the good stuff.
You need to check a few specific locations where Scribus stores its data. I’m giving you the exact paths so you don’t have to guess.
Start with Application Support. Navigate to ~/Library/Application Support/ and look for a folder called Scribus. If it’s there, delete it.
Next, hit Preferences. Go to ~/Library/Preferences/ and search for any file that starts with net.scribus.scribus. Usually it’s a .plist file. Trash it.
Then check Caches. Head to ~/Library/Caches/ and delete the folder named net.scribus.scribus if you find it.
Last stop is Saved Application State. Go to ~/Library/Saved Application State/ and remove the folder called net.scribus.scribus.savedState.
(Pro tip: Use Finder’s search function in each folder if you’re having trouble spotting the files.) We explore this concept further in How Can Shotscribus Software Help the Environment.
Here’s the thing though. Be careful. Only delete files you’re absolutely certain belong to Scribus. If you’re not sure what something is, leave it alone. You don’t want to accidentally remove files that another app needs.
Step 4: Empty the Trash
Almost there.
Right-click your Trash icon and select Empty Trash. Confirm when it asks if you’re sure.
That’s it. Scribus is gone. Completely.
No hidden files. No leftover preferences. Just a clean system ready for whatever you install next.
And honestly? Once you’ve done this once, you’ll never feel intimidated by manual uninstalls again. You’ll know exactly where apps hide their files and how to get rid of them for good.
That’s the advantage most guides won’t mention. You’re not just removing Scribus. You’re learning how your Mac actually works under the hood.
Final Check: Verifying the Complete Removal
You’ve deleted the app. But is it really gone?
Most people think dragging something to the trash means it’s done. Then they find leftover files eating up storage months later.
I want to show you two quick ways to make sure you actually uninstalled Shotscribus completely.
Use Spotlight to Hunt Down Stragglers
Hit Command + Space and type “Scribus” into the search bar. If anything pops up, you’ve got remnants hiding somewhere.
Check the results carefully. You might see preference files in your Library folder or cached data you missed. Delete anything that shows up.
Some people say this step is overkill. They argue that a few leftover preference files won’t hurt anything. And technically, they’re right about the harm part.
But here’s what they don’t consider. Those files add up over time. Every app you half-remove leaves a trail.
Restart Your Mac
After you finish searching, restart your system. This clears temporary files and makes sure nothing’s still running in the background.
It’s simple but it matters. Your Mac needs a fresh start to fully recognize that the software is gone.
Now you know how can shotscribus software be protected and how to uninstall shotscribus software in mac the right way. No traces left behind. To ensure a clean and complete removal of any lingering files, it’s crucial to follow the proper steps for uninstalling Shotscribus software on a Mac, leaving no traces behind. To ensure optimal performance and maintain your Mac’s cleanliness, it’s essential to understand how to uninstall Shotscribus properly, leaving no traces of the software behind.
Your Mac is Now Free of Scribus
You’ve successfully removed Scribus from your Mac.
Not just the app itself. Everything.
Most people drag an app to the trash and think they’re done. But those leftover files stick around and take up space you could be using for something else.
You followed either the automated method or the manual steps. Either way, you’ve cleared out all the support files, caches, and preferences that a basic uninstall leaves behind.
Your Mac is cleaner now. You’ve freed up storage and prevented potential conflicts down the road.
Here’s what matters: You now know how to uninstall ShotScribus software in Mac the right way. You can apply this same process to other apps when you need a complete removal.
This is how you take control of your system. No guesswork and no digital clutter building up over time.
Next time you need to uninstall something, you’ll know exactly what to do. Shotscribus Software.
 Drevian Quenvale writes the kind of ai algorithms and machine learning content that people actually send to each other. Not because it's flashy or controversial, but because it's the sort of thing where you read it and immediately think of three people who need to see it. Drevian has a talent for identifying the questions that a lot of people have but haven't quite figured out how to articulate yet — and then answering them properly.
They covers a lot of ground: AI Algorithms and Machine Learning, Tech Innovation Alerts, Expert Tutorials, and plenty of adjacent territory that doesn't always get treated with the same seriousness. The consistency across all of it is a certain kind of respect for the reader. Drevian doesn't assume people are stupid, and they doesn't assume they know everything either. They writes for someone who is genuinely trying to figure something out — because that's usually who's actually reading. That assumption shapes everything from how they structures an explanation to how much background they includes before getting to the point.
Beyond the practical stuff, there's something in Drevian's writing that reflects a real investment in the subject — not performed enthusiasm, but the kind of sustained interest that produces insight over time. They has been paying attention to ai algorithms and machine learning long enough that they notices things a more casual observer would miss. That depth shows up in the work in ways that are hard to fake.
Drevian Quenvale writes the kind of ai algorithms and machine learning content that people actually send to each other. Not because it's flashy or controversial, but because it's the sort of thing where you read it and immediately think of three people who need to see it. Drevian has a talent for identifying the questions that a lot of people have but haven't quite figured out how to articulate yet — and then answering them properly.
They covers a lot of ground: AI Algorithms and Machine Learning, Tech Innovation Alerts, Expert Tutorials, and plenty of adjacent territory that doesn't always get treated with the same seriousness. The consistency across all of it is a certain kind of respect for the reader. Drevian doesn't assume people are stupid, and they doesn't assume they know everything either. They writes for someone who is genuinely trying to figure something out — because that's usually who's actually reading. That assumption shapes everything from how they structures an explanation to how much background they includes before getting to the point.
Beyond the practical stuff, there's something in Drevian's writing that reflects a real investment in the subject — not performed enthusiasm, but the kind of sustained interest that produces insight over time. They has been paying attention to ai algorithms and machine learning long enough that they notices things a more casual observer would miss. That depth shows up in the work in ways that are hard to fake.